Starting a new PC is exciting, but it can be tricky. Many people ask if they can do a clean install windows 10 on a blank machine.
The answer is yes, with some preparation. Our detailed windows 10 installation guide will show you how.
By following our steps, your new pc setup will start fresh and fast. You’ll enjoy top performance and stability from the beginning.
This approach removes old software problems. It lets you control your computer fully. Let’s start making your machine perfect.
Essential Preparations for Installing Windows 10
Before you start, getting ready is key for a smooth Windows 10 setup. Make sure you have all the right parts and files ready. This avoids any hiccups during the installation.
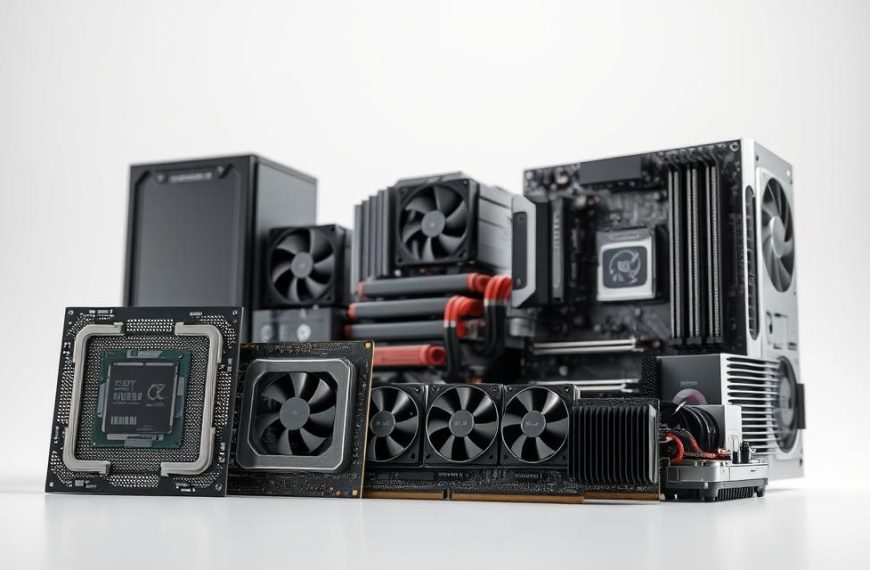
Gathering Necessary Hardware and Software
Having the right gear ready makes installing Windows 10 easy. You need compatible hardware and the right software.
System Requirements for Windows 10
Microsoft has set windows 10 system requirements for your computer. These ensure your system runs well without problems.
You’ll need a 1GHz processor, 2GB RAM for 64-bit systems, and 20GB free space. Your graphics card must support DirectX 9 and WDDM 1.0 for the best display.
You’ll also need a USB flash drive with at least 8GB for create bootable usb media. Make sure it’s empty as it will be formatted.
A valid Windows 10 product licence key is vital for activation. Keep this 25-character code handy for setup.
Downloading Windows 10 Installation Media
Microsoft offers safe tools for getting Windows 10 files. Using official sources avoids security risks from untrusted downloads.
Using the Media Creation Tool from Microsoft’s Website
The best way is to download the media creation tool from Microsoft’s site. It walks you through making installation media.
Go to Microsoft’s download page and pick the Media Creation Tool. It will download Windows 10 files and get your USB ready for installation.
Remember to format your USB drive as FAT32 before using the Media Creation Tool. This makes it work with most computers during boot.
How to Install Windows 10 on a Computer Without an Operating System
Now that you have your installation media, you can start the installation. This part will guide you through making your media bootable and setting up your system’s firmware. This ensures it recognises and uses your installation device.
Creating a Bootable USB Drive
First, you need to make installation media. You’ll need a USB drive with at least 8GB of space. Make sure it’s formatted to FAT32 for compatibility.
Step-by-Step Process Using Media Creation Tool
The Media Creation Tool by Microsoft is the easiest way to make Windows 10 bootable USB drives. Download it from Microsoft’s website and follow these steps:
- Run the Media Creation Tool and accept the license terms
- Select “Create installation media for another PC”
- Choose your preferred language, edition, and architecture
- Select “USB flash drive” as your media type
- Pick your connected USB drive from the list
- Wait for the download and creation process to complete

The tool will format your drive and copy all files. This makes sure your media is reliable.
Alternative Method with Rufus Software
If you need more control or have issues with the official tool, Rufus is a good alternative. It handles ISO files and USB creation with extra options:
- Download the Windows 10 ISO file separately
- Launch Rufus and select your USB device
- Choose the downloaded ISO file
- Select GPT partition scheme for UEFI systems
- Maintain FAT32 file system format
- Click start and wait for completion
Rufus is great for creating media for computers with special hardware or UEFI needs.
Configuring BIOS/UEFI Settings
Before you can start, your computer must boot from the USB drive, not the empty hard drive. You need to access your system’s firmware settings.
Accessing BIOS/UEFI and Changing Boot Order
To get into your system’s firmware, restart your computer and press the right key during startup. Common keys are:
- Delete (Del)
- Escape (Esc)
- F2, F10, or F12
Manufacturers use different keys, so check your motherboard manual if these don’t work. In the settings, find the boot menu or boot priority section.
To change BIOS boot order, put your USB device at the top of the boot sequence. This tells your computer to look for bootable USB media first.
Some systems have temporary boot menus. Press F8, F11, or F12 during startup to choose boot devices without changing settings permanently.
Important Security and Compatibility Settings
Modern computers have security features that might block Windows installation. Proper UEFI settings configuration ensures compatibility while keeping security:
- Secure Boot: Disable this temporarily if your installation media isn’t recognised
- TPM (Trusted Platform Module): Enable for Windows 11 compatibility but may require disabling for some installations
- CSM (Compatibility Support Module): Enable for older hardware or legacy boot methods
- SATA Operation: Set to AHCI mode for best performance with Windows 10
After adjusting these settings, save and exit the firmware. Your computer will restart and should find your bootable USB drive. For more help, see this detailed installation guide.
With your media ready and your system set up, you’re ready to start the Windows 10 installation.
Executing the Windows 10 Installation Process
With your bootable USB ready and BIOS set, you’re ready to start Windows 10 installation. This step is key to turning your blank computer into a fully working system.
Booting from USB and Starting Installation
Restart your computer with the USB in. It should find the USB and start the Windows setup. If not, check your BIOS/UEFI settings again.
Navigating the Initial Setup Screens
The first windows setup screens ask for your language, time, and keyboard settings. Pick what you want and click “Next”. Then, click “Install Now” to start.
Next, you’ll see a screen for your product key. Don’t worry if you don’t have it yet. You can skip this step for now.
Choose “Custom: Install Windows only (advanced)” next. This lets you control your installation, which is key for new computers.
Partitioning the Hard Drive
Partitioning is a critical step. It’s where you decide how to use your storage space.
Creating and Formatting Partitions
You’ll see a list of drives. Pick the unallocated space for a new computer. Click “New” to make partitions.
Here are some partition size tips:
- System partition: At least 64GB for Windows 10
- Other partitions: Use the rest as you see fit
After making partitions, pick your system partition and click “Format”. This gets your space ready for Windows.
Best Practices for Drive Management
When you partition hard drive space, think about separate areas for your OS, programs, and files. This makes things easier and safer.
- Backups and recovery are simpler
- Your files and apps are better organised
- System problems won’t risk your data as much
Most people only need one system partition. But, if you’re tech-savvy, you might want more for different uses.
Completing Installation and Initial Setup
After picking your partition, Windows starts copying files. This takes about 20-30 minutes. Your computer will restart a few times.
Entering Product Key and Personalising Settings
Once copying is done, Windows sets up your system. You’ll make choices like your region, keyboard, and privacy settings.
- Region selection – Pick your country or region
- Keyboard layout – Confirm or change your input method
- Privacy settings – Adjust to your liking
You can also enter your product key here. Doing so now means your system works fully right away.
Installing Essential Drivers and Updates
After setup, you’ll see your desktop. First, connect to the internet to install windows 10 from usb fully. This includes downloading important updates.
Go to Settings > Update & Security > Windows Update. Look for updates right away. This ensures you get the latest security and driver updates.
Windows Update will find and install drivers for your hardware. For the best performance, also check your computer’s website for specific drivers.
Post-Installation Steps and Optimisations
After installing Windows 10, you have more to do. These steps make sure your system works well, stays safe, and is ready for everyday use.
Ensuring System Stability and Security
When you first set up Windows, check your hardware and security. These steps are key to a good computing experience.
Verifying Driver Installations and Hardware Functionality
Drivers are vital for your hardware to work right. Start by looking at Device Manager for any yellow marks.
Go to Settings > Update & Security > Windows Update to get missing drivers. This usually covers most hardware needs.
Test your audio, network, and display to make sure they’re working. For special hardware, visit the maker’s site for drivers.

If you skipped activating Windows, go to Settings > Update & Security > Activation. Use your product key to unlock features and get updates.
Windows Defender is great for protection. Keep real-time protection on and do scans often. Set up your firewall to keep things running smoothly.
Use Windows Hello for biometric login if your device supports it. Make a strong password and think about using BitLocker for data safety.
Installing Essential Software and Applications
Now your system is stable and secure, it’s time for useful programmes. Start with the basics before adding more.
Recommended Programmes for New Installations
Every Windows setup needs core software. These apps turn your system into a full workstation.
Use web browsers like Google Chrome or Mozilla Firefox for better browsing. Office suites, like Microsoft Office or LibreOffice, are great for documents.
Even with Windows Defender, add Malwarebytes for extra protection. A password manager keeps your login details safe.
Media players like VLC handle different file types. Tools like 7-Zip manage archives well. Cloud storage apps, like Dropbox or Google Drive, sync files across devices.
| Software Category | Recommended Options | Primary Function |
|---|---|---|
| Web Browser | Google Chrome, Mozilla Firefox | Internet browsing and web applications |
| Office Suite | Microsoft Office, LibreOffice | Document creation and editing |
| Security Software | Malwarebytes, Bitdefender | Additional malware protection |
| Media Player | VLC Media Player | Video and audio playback |
| Compression Tool | 7-Zip, WinRAR | File compression and extraction |
Always download from trusted sources. Avoid installers with extra programmes you don’t need.
Conclusion
Setting up Windows 10 on a computer without an OS is a detailed process. It starts with preparation and making bootable media. Then, you need to adjust BIOS/UEFI settings and run the installation.
After that, you should optimise your system. This ensures your computer works well from the start.
This guide shows that your new PC is now ready to go. It’s stable, secure, and has all the necessary software. Your computer is fully set up for your use.
FAQ
Is it possible to install Windows 10 on a computer with no operating system?
Yes, you can install Windows 10 on a bare-metal PC. You need a valid licence key, compatible hardware, and a bootable USB drive. With these, you can do a clean installation.
What are the minimum system requirements for installing Windows 10?
Windows 10 needs a 1 GHz processor and 2 GB RAM for 64-bit systems or 1 GB for 32-bit. It also requires 20 GB of free space and a DirectX 9-compatible graphics card. Make sure your hardware meets these specs.
Do I need a product key to install Windows 10?
Yes, you need a valid Windows 10 product licence key for activation. You can start installation without the key. But, you’ll need it to fully activate and use Windows after setup.
How do I create a bootable USB drive for Windows 10 installation?
Use Microsoft’s Media Creation Tool to create a bootable USB. It downloads the files and prepares the drive. For advanced users, Rufus offers flexibility.
How do I access the BIOS or UEFI settings on a new computer?
Press a specific key during startup to access BIOS/UEFI. This key varies by motherboard. Check your device’s manual or look for an on-screen prompt.
What should I do if my computer doesn’t boot from the USB drive?
Make sure the boot priority is set right in BIOS/UEFI for the USB drive. Also, disable Secure Boot if needed. Ensure the USB drive is correctly created and recognised.
How should I partition my hard drive during Windows 10 installation?
For a clean install, delete existing partitions and let Windows Setup create new ones. You can also manually create and format partitions based on your needs.
What are the first steps after Windows 10 is installed?
Connect to the internet to download drivers and updates via Windows Update. Then, check Device Manager for hardware functionality. Activate Windows with your product key if needed.
How do I ensure my new Windows 10 installation is secure?
Enable Windows Defender for protection. Configure privacy settings during setup. Keep your system updated. Consider adding more security software for extra protection.
What essential software should I install after setting up Windows 10?
Install a web browser like Microsoft Edge, Google Chrome, or Mozilla Firefox. Also, get security software, productivity tools like Microsoft Office, and drivers for your hardware.
 By
By